-
Cable Internet
-
Cable TV
-
Dial-Up
-
Digital Telephone
- Calix 844E Digital Phone Adapter Setup Guide
- Connection Setup (Tilgin 452/453W)
- Connection Setup for DHCP (Tilgin 322)
- Connection Setup for DHCP (Tilgin HG1311/1351)
- Connection Setup for DHCP (Tilgin HG2301)
- Connection Setup for PPPoE (Tilgin 322)
- Connection Setup for PPPoE (Tilgin HG1311/1351)
- Connection Setup for PPPoE (Tilgin HG2301)
-
DSL
- Comtrend NexusLink 3120 Wireless Gateway Setup
- Connection Setup on a Comtrend AR-5381u modem
- Connection Setup on a D-Link Router
- Connection Setup on a Linksys Smart Wifi Router
- Connection Setup on a ZyXEL P-660HN-51 modem
- Connection Setup on Linksys Router
- Connection Setup on Mac OSX
- Connection Setup on Windows 7
- Connection Setup on Windows 8
- Connection Setup on Windows Vista
- Connection Setup on Windows XP
-
Email Protection
-
Fibre Internet
-
Nexicom Email
- Adding a contact to your contact list (Webmail)
- Attaching a File Using the Webmail
- Email Setup in Incredimail
- Email Setup in Mac Mail
- Email Setup in Mail for Windows 10
- Email Setup in Mozilla Thunderbird
- Email Setup in Outlook (Office 365)
- Email Setup in Outlook 2003
- Email Setup in Outlook 2007
- Email Setup in Outlook 2010
- Email setup in Outlook 2013
- Email Setup in Outlook Express
- Email Setup in Windows Live Mail
- Email Setup in Windows Mail
- Email Setup on Android Phone or Tablet
- Email Setup on iPad (iOS7)
- Email Setup on iPad (Pre-iOS7)
- Email Setup on iPhone/iPod Touch (iOS 7+)
- Email Setup on iPhone/iPod Touch (Pre-iOS7)
- Important information for using email outside Canada!
- Logging in to the Nexicom Webmail
- Setting up an Auto-Responder
- Setting up Email Forwarding
- Show all articles ( 8 ) Collapse Articles
-
Nexicom Routers
-
NexiPhone (Landline)
-
Security
-
Web Hosting
-
Wireless Internet
Connection Setup on Windows Vista
1. Click the Start button.
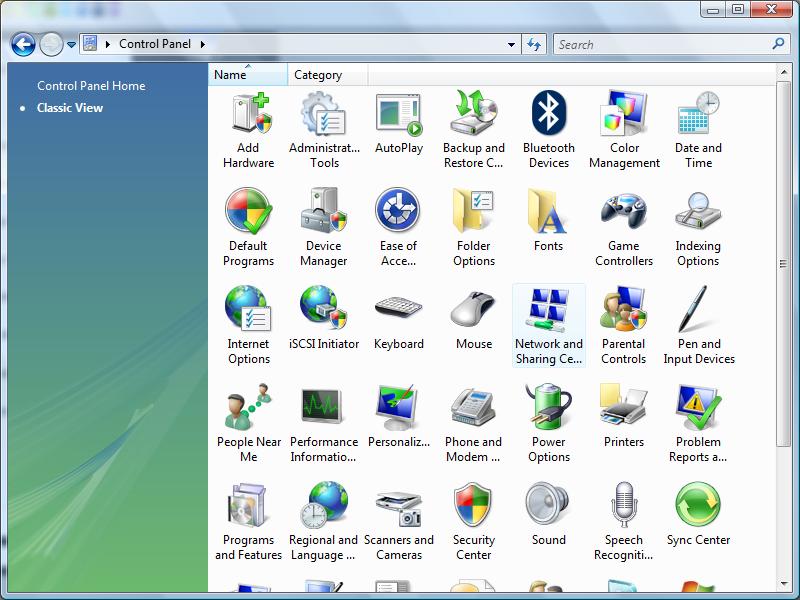
2. Click Control Panel.
3. Double-click Network and Sharing Center. Proceed to step 4.
If you do not see Network and Sharing Center, proceed to step 3a.
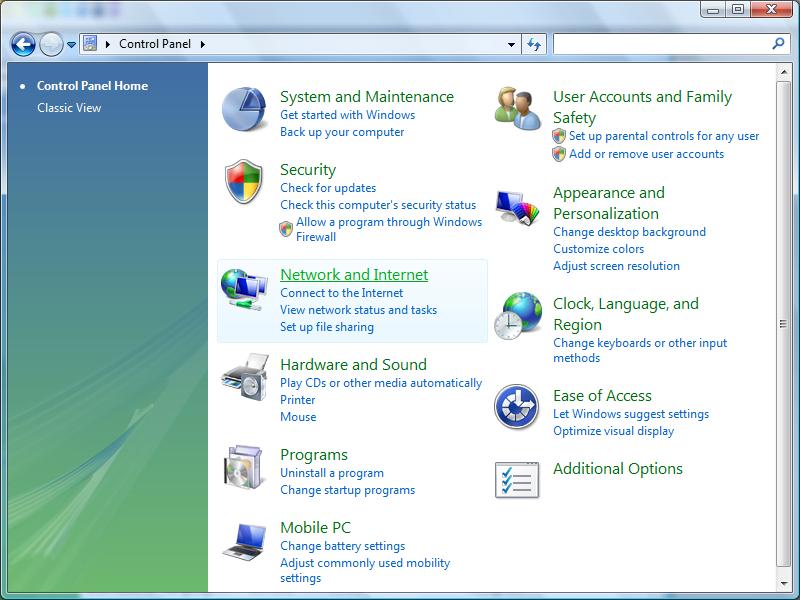
3a. Click Network and Internet. Proceed to step 3b.
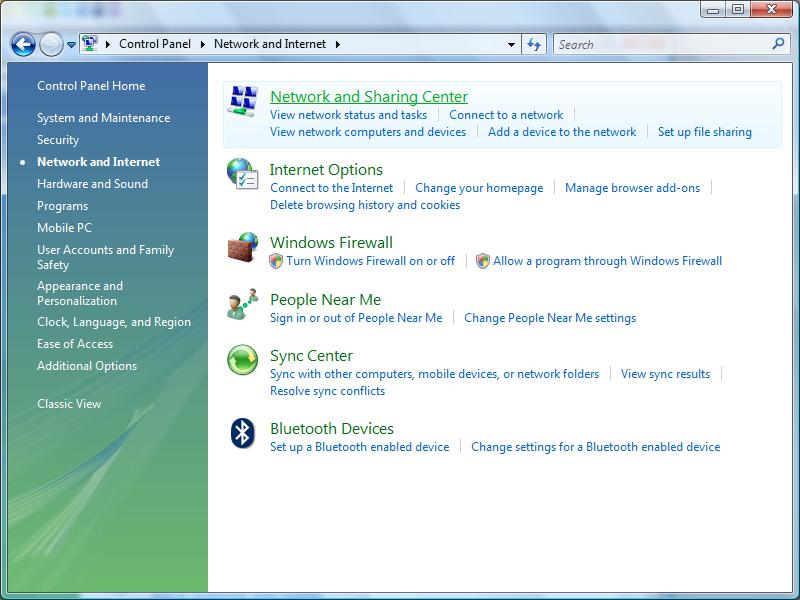
3b. Click Network and Sharing Center.
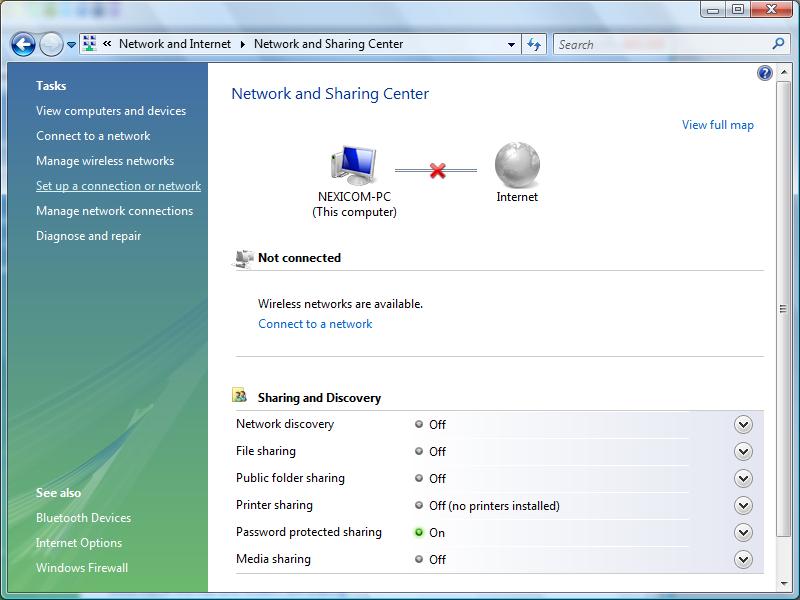
4. Click Set up a connection or network.
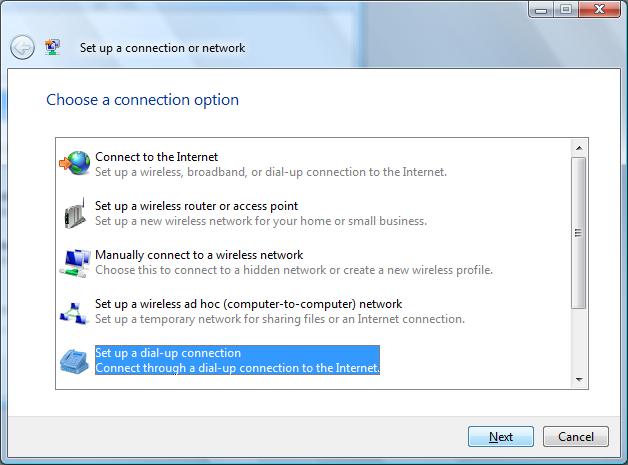
5. Select Set up a dial-up connection and click Next.
6. Fill in the fields with the corresponding information:
- Dial-up phone number – A 10-digit dial-up phone number
- User name – Your Nexicom user name (must end with @nexicom.net)
- Password – Your Nexicom password
- Connection Name – A name for your connection
Click Connect.
Note: Note: Some dial-up customers will need to use the formatting idm/nexicomflat/username@nexicom.net for their username.
If you are unaware as to what the local dial-up number is in your area, please contact our helpdesk by phone at 705-775-6394, toll free at 1-888-639-4266, or by email at support@nexicom.net
The Internet helpdesk is open Monday-Friday from 8am-10pm, Saturday from 8am-5pm, and Sunday from 9am-5pm.
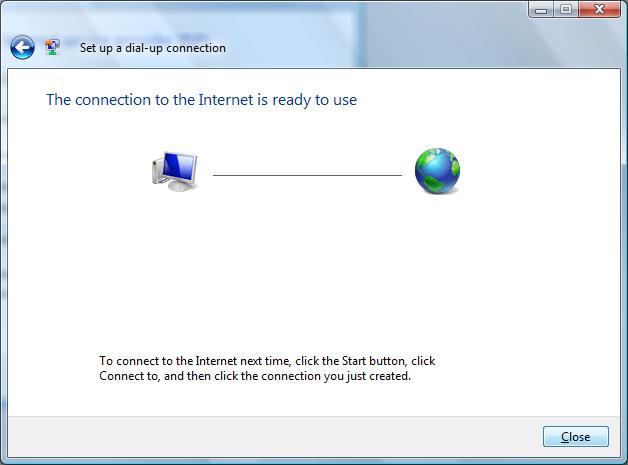
7. You should now see a screen that tells you The connection to the Internet is ready to use.
Click Close to begin using your Nexicom Internet service.