
Email Setup in Outlook (Office 365)
POP3 Instructions
These instructions apply to Outlook (Office 365). They should be similar to other versions of Outlook.
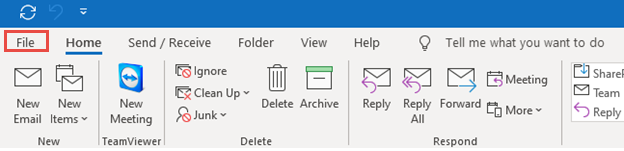
1. Click the File button in the top left corner of Outlook.
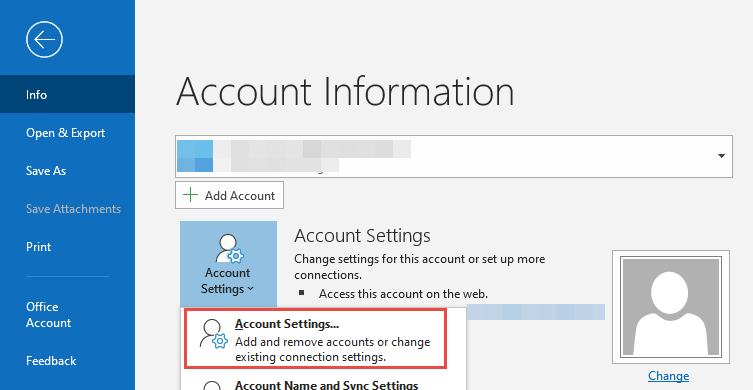
2. Click Account Settings, followed by Account Settings…
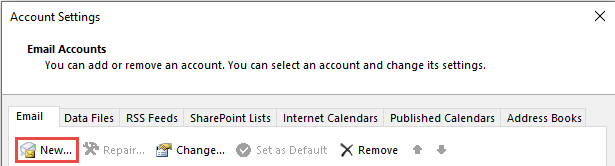
3. Click New…
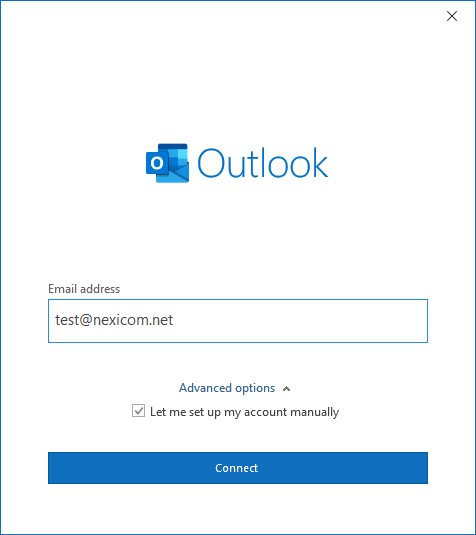
4. Enter your Email Address, then select Advanced options, check the box for Let me set up my account manually.
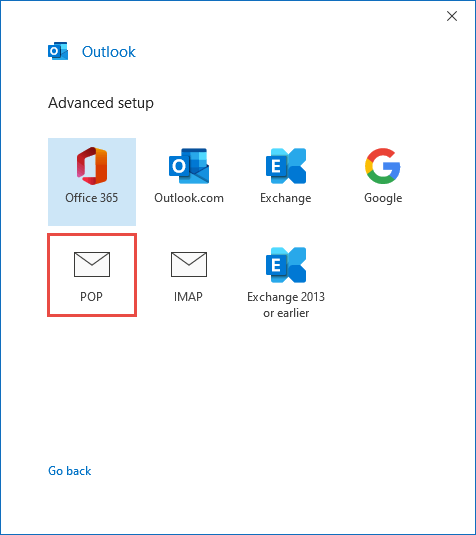
5. Click on POP.
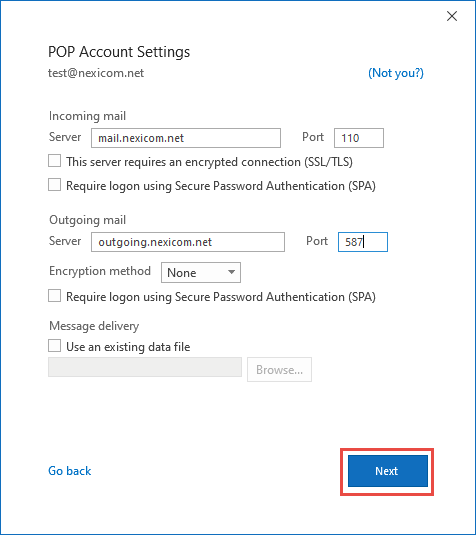
6. Fill in the fields with the corresponding information:
Incoming
– Server – Type mail.nexicom.net in this box
– Port – Type the number 110 in this box
– Do not check either of the boxes below
Outgoing
– Server – Type outgoing.nexicom.net
– Port – Type the number 587 in this box
– Encryption – Leave as None
– Do not check the box
Click on Next
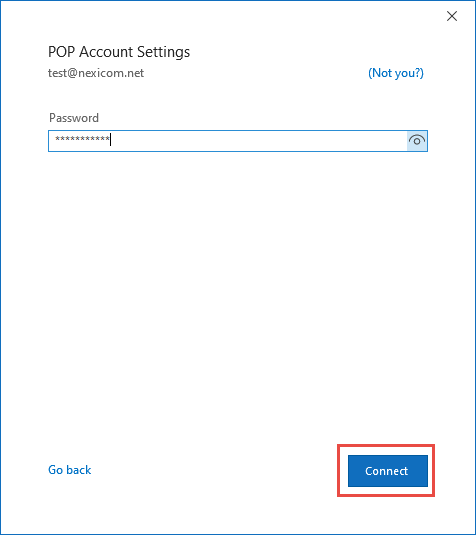
7. Enter your Password. Click on Connect.
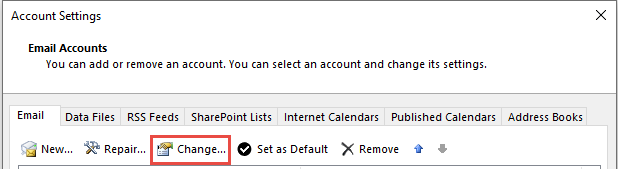
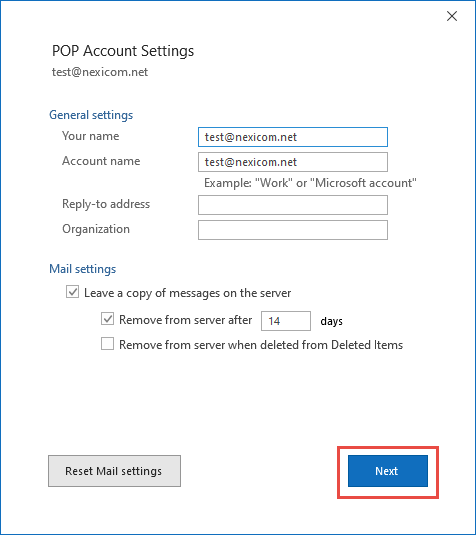
To change the Display name on outgoing emails, click Change… after the account is set up.
Change your email address in Your name to how you want sent emails to display
You can also update Account name to a description (ex. Nexicom email)
Click Next.
Click Done
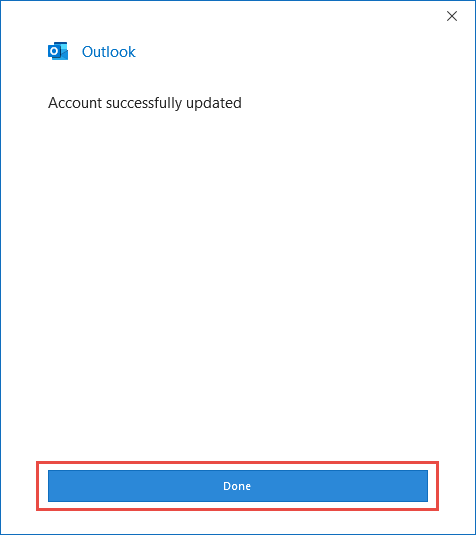
Your account is now set up.