How Can We Help?
-
Cable Internet
-
Dial-Up
-
Digital Telephone
-
DSL
-
Email Protection
-
Fibre Internet
-
My Account
-
Nexicom Email
- Adding a contact to your contact list (Webmail)
- Attaching a File Using the Webmail
- Check Multiple Nexicom Email Accounts with One Login
- Email Setup in Incredimail
- Email Setup in Mac Mail
- Email Setup in Mail for Windows 10
- Email Setup in Mozilla Thunderbird
- Email Setup in Outlook (Office 365)
- Email Setup in Outlook 2003
- Email Setup in Outlook 2007
- Email Setup in Outlook 2010
- Email setup in Outlook 2013
- Email Setup in Outlook Express
- Email Setup in Windows Live Mail
- Email Setup in Windows Mail
- Email Setup on Android Phone or Tablet
- Email Setup on iPad (iOS7)
- Email Setup on iPad (Pre-iOS7)
- Email Setup on iPhone/iPod Touch (iOS 7+)
- Email Setup on iPhone/iPod Touch (Pre-iOS7)
- Important information for using email outside Canada!
- Logging in to the Nexicom Webmail
- Setting up an Auto-Responder
- Setting up Email Forwarding
- Show all articles (9) Collapse Articles
-
Nexicom Routers
-
NexiPhone (Landline)
-
Security
-
TV
-
Web Hosting
- A Web Hosting and Domain Registration Self Serve Guide
- Backup your website
- Deleting Mail From Webmail
- Exceeding Resource Limits
- Getting Free SSL/TLS Certificate from Let's Encrypt
- Hosting Email Setup
- Hosting Email Setup In Thunderbird
- Hosting Email Setup on Android Phone or Tablet
- Hosting Email Setup on iPhone or iPad
- How to create a subdomain
- Login to your Web Hosting Control Panel (Plesk)
- Manage Whitelist and Blacklist
- Updating your DNS record
- Website is showing a default webpage
-
Wireless Internet
< All Topics
Print
Email Setup in Windows Live Mail
Date CreatedDecember 4, 2013
Last UpdatedMay 28, 2025
Views20
1. Click on the Accounts tab.
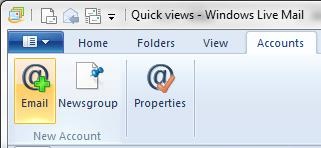
2. Click on the Email button.
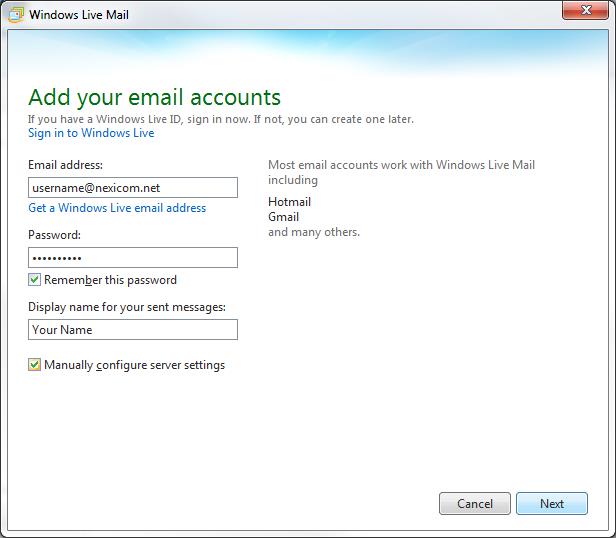
3. Fill in the fields with the corresponding information:
- Email Address – Your full Nexicom email address
- Password – The password that corresponds with your email address
- Display Name – Whatever you enter here will be displayed on your outgoing messages.
Click to add a check mark into the box labeled Manually configure server settings.
Click the Next button.
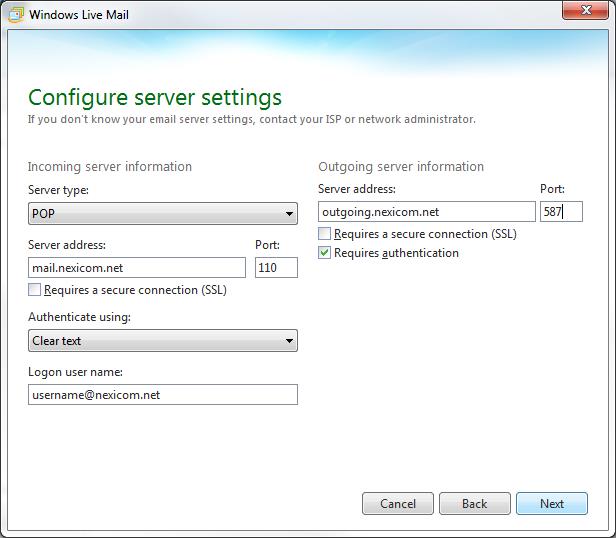
4. Fill in the fields with the corresponding information:
Under the Incoming server information heading
- Server type – Select POP from the drop down menu
- Server address – Type mail.nexicom.net in this box
- Port – Type the number 110 in this box
- Authenticate using – Select Clear text from the drop down menu
- Logon user name – Type your full Nexicom email address in this box.
Under the Outgoing server information heading
- Server address – Type outgoing.nexicom.net in this box
- Port – Type the number 587 in this box
Click to add a check mark in the box labeled Requires authentication
Click the Next button.
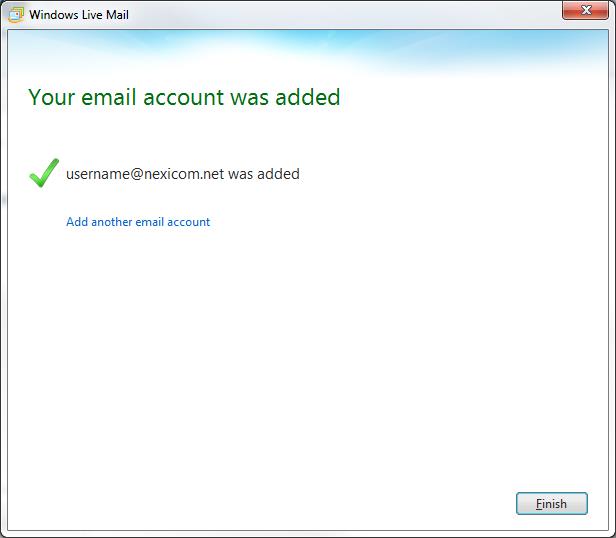
5. You will now see a confirmation message saying that your email account was added.
Click the Finish button to begin using your email account.