How Can We Help?
-
Cable Internet
-
Dial-Up
-
Digital Telephone
-
DSL
-
Email Protection
-
Fibre Internet
-
My Account
-
Nexicom Email
- Adding a contact to your contact list (Webmail)
- Attaching a File Using the Webmail
- Check Multiple Nexicom Email Accounts with One Login
- Email Setup in Incredimail
- Email Setup in Mac Mail
- Email Setup in Mail for Windows 10
- Email Setup in Mozilla Thunderbird
- Email Setup in Outlook (Office 365)
- Email Setup in Outlook 2003
- Email Setup in Outlook 2007
- Email Setup in Outlook 2010
- Email setup in Outlook 2013
- Email Setup in Outlook Express
- Email Setup in Windows Live Mail
- Email Setup in Windows Mail
- Email Setup on Android Phone or Tablet
- Email Setup on iPad (iOS7)
- Email Setup on iPad (Pre-iOS7)
- Email Setup on iPhone/iPod Touch (iOS 7+)
- Email Setup on iPhone/iPod Touch (Pre-iOS7)
- Important information for using email outside Canada!
- Logging in to the Nexicom Webmail
- Setting up an Auto-Responder
- Setting up Email Forwarding
- Show all articles (9) Collapse Articles
-
Nexicom Routers
-
NexiPhone (Landline)
-
Security
-
TV
-
Web Hosting
- A Web Hosting and Domain Registration Self Serve Guide
- Backup your website
- Deleting Mail From Webmail
- Exceeding Resource Limits
- Getting Free SSL/TLS Certificate from Let's Encrypt
- Hosting Email Setup
- Hosting Email Setup In Thunderbird
- Hosting Email Setup on Android Phone or Tablet
- Hosting Email Setup on iPhone or iPad
- How to create a subdomain
- Login to your Web Hosting Control Panel (Plesk)
- Manage Whitelist and Blacklist
- Updating your DNS record
- Website is showing a default webpage
-
Wireless Internet
< All Topics
Print
Email Setup in Outlook 2003
Date CreatedDecember 9, 2013
Last UpdatedMay 26, 2025
Views21
1. Click Tools.
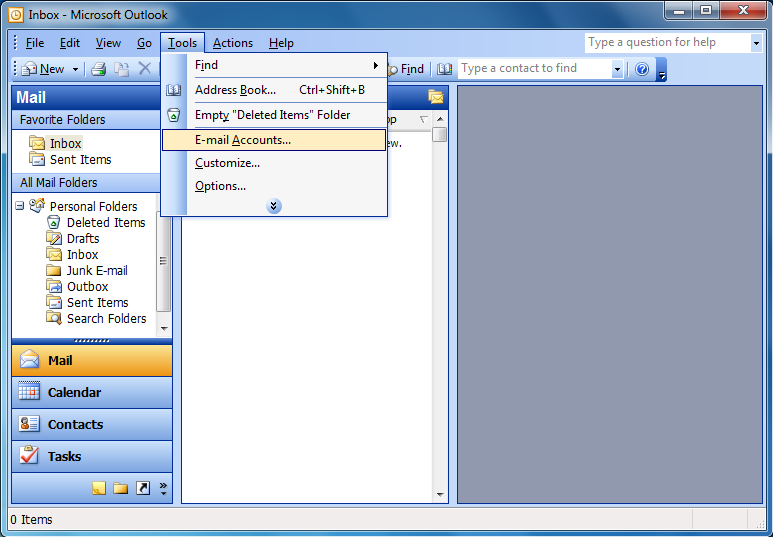
2. Click Email Accounts…
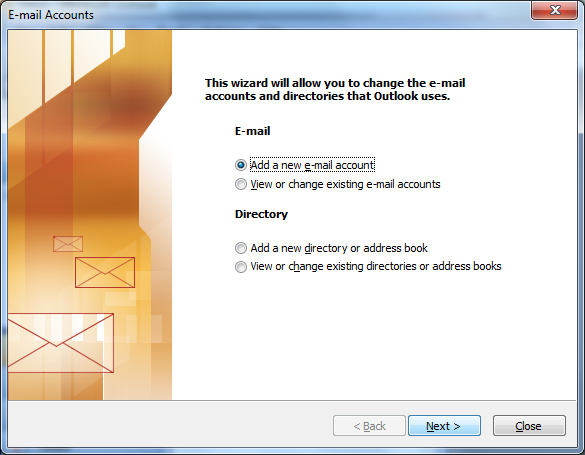
3. Click to add a dot in the circle labeled Add a new email account and click Next.
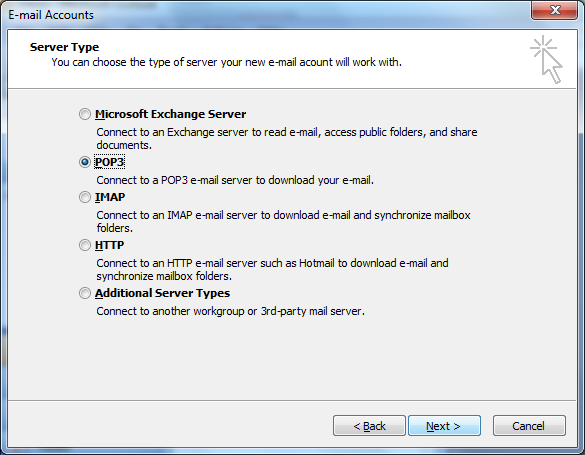
4. Click to add a dot in the circle labeled POP3 and click Next.
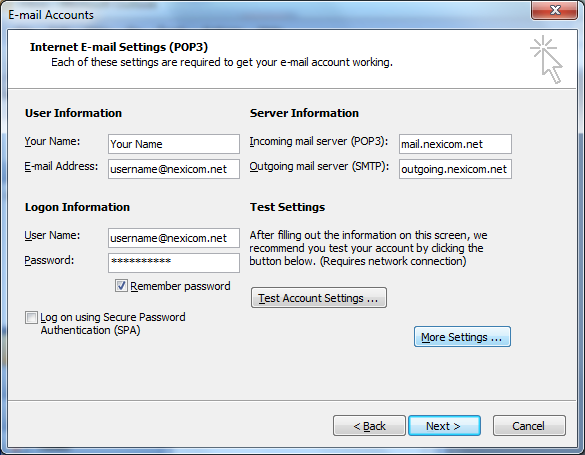
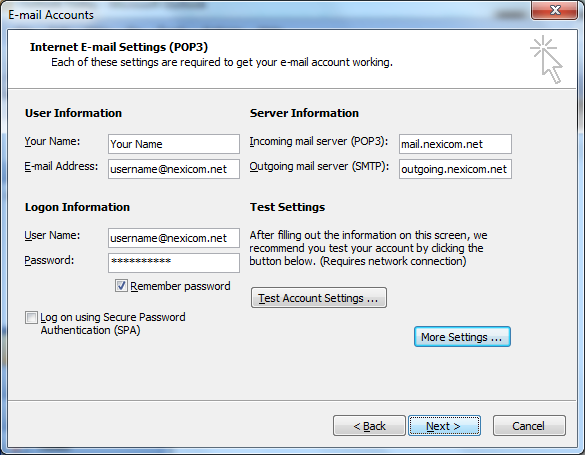
5. Fill in the fields with the corresponding information:
- Your Name – Your name (Whatever you enter here will be displayed on your outgoing messages)
- E-mail Address – Your full Nexicom email address
- User Name – Your full Nexicom email address (this must match what was entered in the Email Address field above)
- Password – The password that corresponds with your email address
- Incoming mail server (POP3) – mail.nexicom.net
- Outgoing mail server (SMTP) – outgoing.nexicom.net
Click More Settings …
6. Click on the tab labeled Outgoing Server.
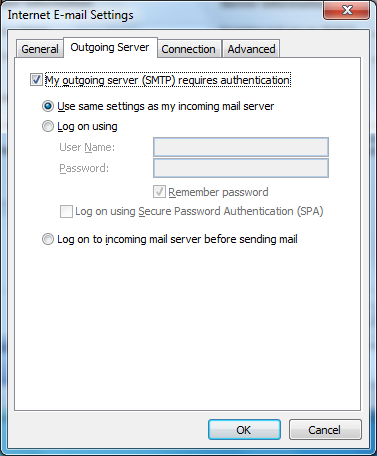
7. Click to add a check mark to the box labeled My outgoing server (SMTP) requires authentication.
Click on the tab labeled Advanced.
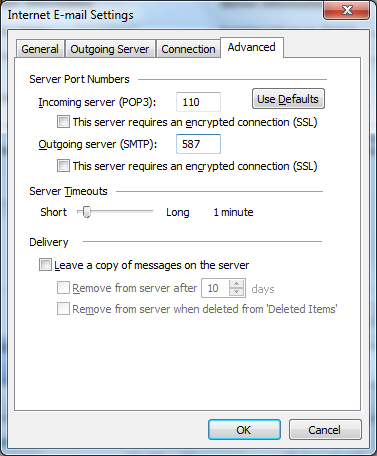
8. Type the number 587 in the box labeled Outgoing server (SMTP).
Click OK.
9. Click Next.
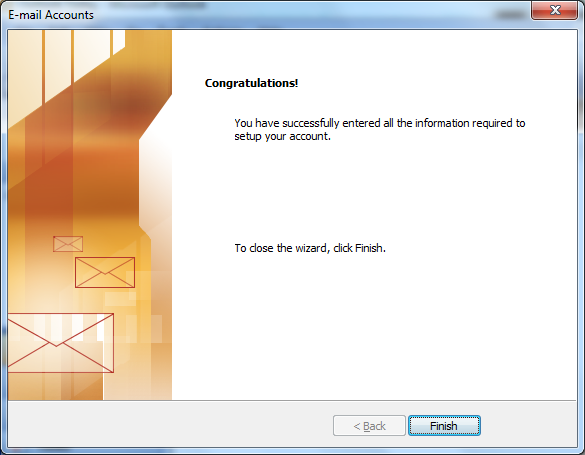
10. You have now entered all of the information required to setup your account. Click Finish to begin using your account.