-
Cable Internet
-
Dial-Up
-
Digital Telephone
-
DSL
-
Email Protection
-
Fibre Internet
-
My Account
-
Nexicom Email
- Adding a contact to your contact list (Webmail)
- Attaching a File Using the Webmail
- Check Multiple Nexicom Email Accounts with One Login
- Email Setup in Incredimail
- Email Setup in Mac Mail
- Email Setup in Mail for Windows 10
- Email Setup in Mozilla Thunderbird
- Email Setup in Outlook (Office 365)
- Email Setup in Outlook 2003
- Email Setup in Outlook 2007
- Email Setup in Outlook 2010
- Email setup in Outlook 2013
- Email Setup in Outlook Express
- Email Setup in Windows Live Mail
- Email Setup in Windows Mail
- Email Setup on Android Phone or Tablet
- Email Setup on iPad (iOS7)
- Email Setup on iPad (Pre-iOS7)
- Email Setup on iPhone/iPod Touch (iOS 7+)
- Email Setup on iPhone/iPod Touch (Pre-iOS7)
- Important information for using email outside Canada!
- Logging in to the Nexicom Webmail
- Setting up an Auto-Responder
- Setting up Email Forwarding
- Show all articles (9) Collapse Articles
-
Nexicom Routers
-
NexiPhone (Landline)
-
Security
-
TV
-
Web Hosting
- A Web Hosting and Domain Registration Self Serve Guide
- Backup your website
- Deleting Mail From Webmail
- Exceeding Resource Limits
- Getting Free SSL/TLS Certificate from Let's Encrypt
- Hosting Email Setup
- Hosting Email Setup In Thunderbird
- Hosting Email Setup on Android Phone or Tablet
- Hosting Email Setup on iPhone or iPad
- How to create a subdomain
- Login to your Web Hosting Control Panel (Plesk)
- Manage Whitelist and Blacklist
- Updating your DNS record
- Website is showing a default webpage
-
Wireless Internet
Email Setup in Mozilla Thunderbird
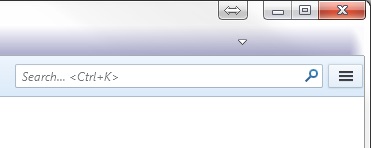
1. Click the button that looks like three horizontal lines at the top right.
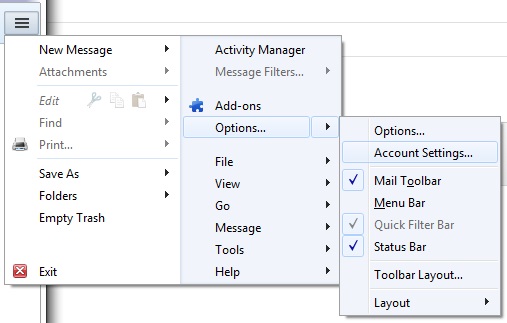
2. Hover the mouse above Options and when it appears, click on Account Settings….
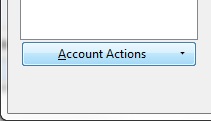
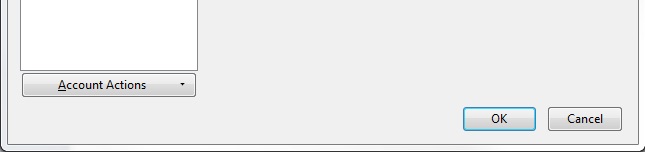
3. Click on Account Actions.
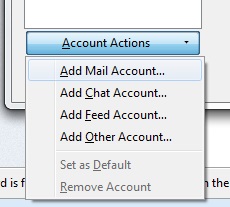
4. Click on Add Mail Account…
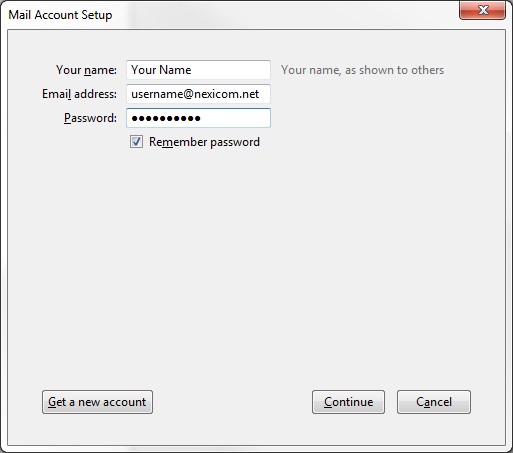
5. Fill in the fields with the corresponding information:
- Your name – Whatever you enter here will be displayed on your outgoing messages
- Email address – Your full Nexicom email address
- Password – The password that corresponds with your email account
Click on the Continue button. *Thunderbird will auto input the wrong server names
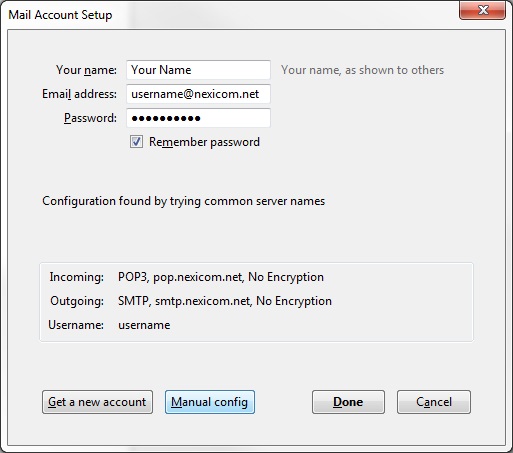
6. Click on the Manual config button to edit the server names.
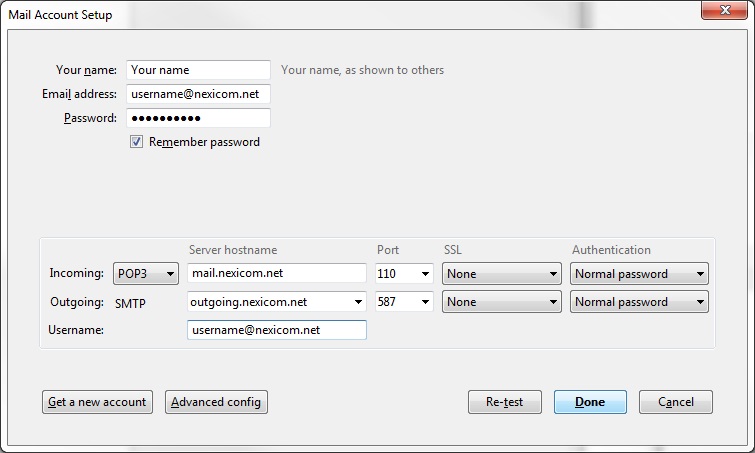
7. Fill in the fields with the corresponding information:
Incoming
- Choose POP3 from the drop down menu
- Server hostname – Type mail.nexicom.net in this box
- Port – Type the number 110 in this box
- SSL – Select None from the drop down menu
- Authentication – Select Normal Password from the drop down menu
Outgoing
- Server hostname – Type outgoing.nexicom.net in this box
- Port – Type the number 587 in this box
- SSL – Select None from the drop down menu
- Authentication – Select Normal Password from the drop down menu
Username – Type your full Nexicom email address in this box
Click the Done button.
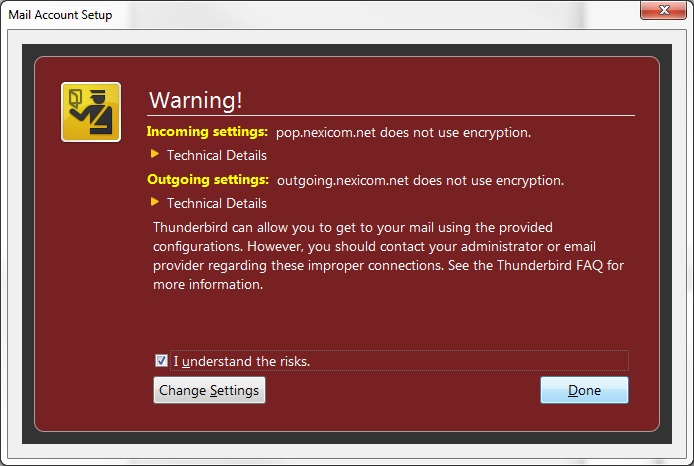
8. Click to add a check mark to the box labeled I understand the risks.
Click the Done button.
9. Your account setup has now been completed.
Click the OK button to being using your account.